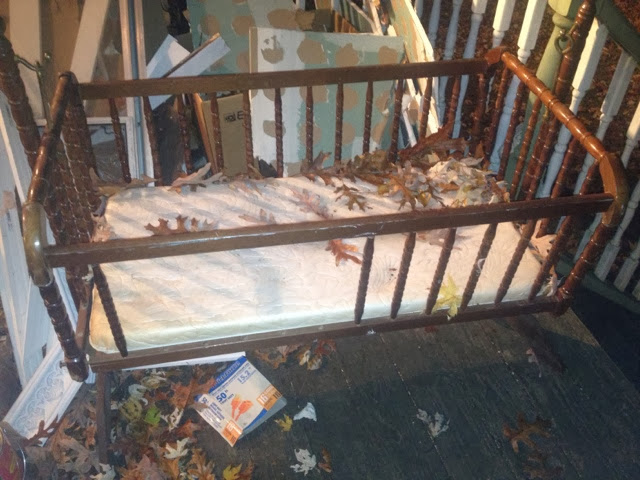
I picked up this roadside treasure almost a decade ago. That was when I lived with my parents and had no room to spare, no room to allow myself to refinish it, and no room to really pick it apart to figure out what I could do with it. Now most people would see no use for this roadside hunk of junk, however for me, I do not see junk. I see turn of the century wood- beautifully carved and detailed... and my goodness why waste something so beautiful!? There are so many uses for this wood- why a garbage dump?! Well... one mans junk is another chic's treasure!
During the move, the crib was plopped up on my deck where it sat for about a week, till I decided to finally do something with it! Last night while it sat helplessly on my deck, with its missing spokes and all... I took a good look at it and began to think about the possibilities that it had to offer. The crib was made of real wood, and featured the sort of Victorian spool look I was going for in my parlor.
I began to think, I could use the wood from this crib and add some sort of decorative element to the parlor.
I began my project at 10pm and was up till midnight slowly taking the crib apart piece by piece, reclaiming the old wood.


After getting the crib fully apart, I had quite a bit to work with, but before I could begin painting the wood black, I needed to fill in screw holes, so on the right you will see the spools covered with goo. That was elmers wood filler, and it worked like a charm.
It dried in about 10 minutes, and I was literally able to sand it down to a nice smooth touch. After the quick hand sanding, I then began to paint.
<-------- That is the finished product. It requires one more coat of paint, and then I can begin putting it to use.
Once my plan is complete, I will share the final results with everyone.
I am right now though so antsy to get the heck out of this office and begin working!
UPDATE:
I finally got around last night to using the reclaimed wood for a project to enhance the corner in our parlor.
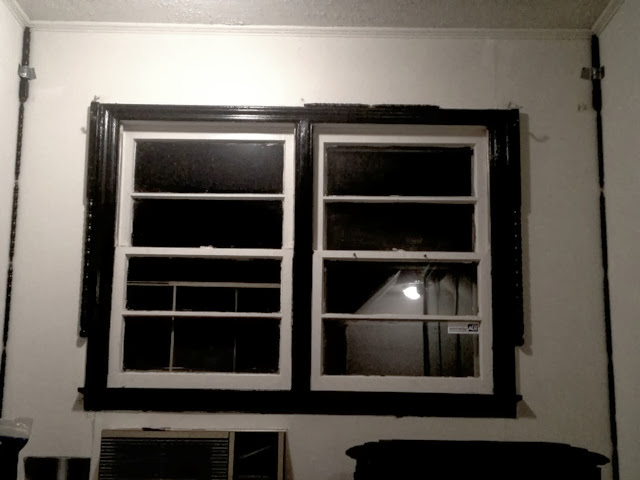
I used the cradles decorative pieces to pretty much outline the window, and then used the smaller decorative pieces and ran them up the inner corners of the wall.
I wished I would have take a before photo, before adding the 2 side pieces of wood, but it is what it is.
In this next photo I took this closeup. You can see the beautiful pieces of wood on the sides of the window, and the smaller spools of wood connected on the inner corner.
I applied the wood using the Loctite Adhesive Power Grab. It worked like a charm.
After the adhesive dried somewhat, I removed the duct tape that I was using to ensure none of the pieces slipped out of place. After removing the tape, I then got started on painting the trim black to match the rest of the parlor.
What I especially loved though was that the crib had 2 small hooks which held the basket in place. I re-used these hooks and placed them on the 2 pieces of wood to create plant holder hooks!
Later on today when I get out of the office, I will use finishing nails to really hold the wood in place, and of course to support the weight of any plants I hang.
Once I clean the room up a bit, I will take a better distance shot, with my better camera so you can get an idea of how detailed the wood truly is. Unfortunately my camera is still packed, and these are iphone shots
I really want to get that ugly A/C unit out of the wall!


No comments:
Post a Comment
Gimme That 2 Cents